Make Your Case Review: Cell Phone Case Maker For Kids (Photos)
About Make Your Case
Make Your Case is a product which allows girls to make two custom cell phone cases completely from scratch, using a mold, silicone gel, and assorted decorations. There are also four pre-made cases for four different phone models, thus allowing most consumers to decorate two rubber cases and one plastic pre-made case for their phone (assuming they only use one of the pre-made cases). The product’s official website is makeyourcases.com, which was registered in September 2013. There is also an official Facebook page which was created in July 2014. The product is marketed by Maya Group, which offers other toys such as Color Splasherz and Orbeez. Make Your Case is available in stores such as Toys R Us, Amazon, Meijer, Kmart, Target, and Walmart. It does not appear that you can purchase the product directly from the official website.
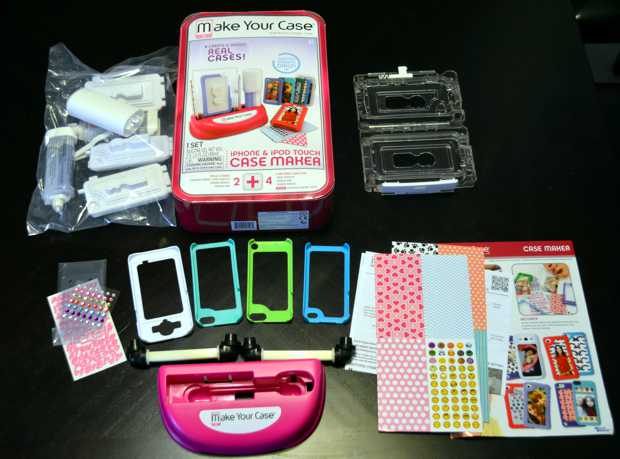
Below are the contents of the Make Your Case kit:
How much does Make Your Case cost?
I found a Make Your Case kit at a local Toys R Us for $24.99. The Case Maker Refill sold for $3.99, while a Needlepoint kit ran for $12.99.
How Make Your Case Works
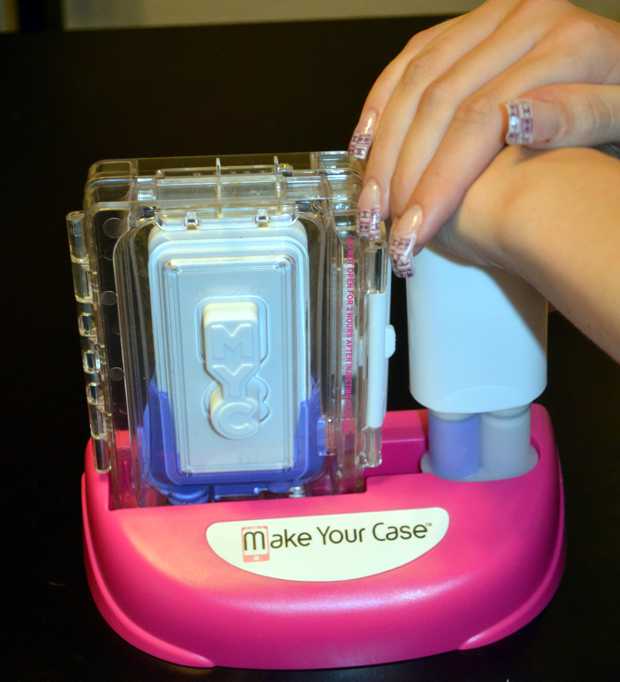
Make Your Case allows girls to create two rubber cell phone cases by injecting silicone into a mold. There is also a pre-made case for four different phone models. After the silicone mold sets for two hours, the rubber case can be decorated and customized. To create a case, you’ll first choose the mold for your phone model. Available phone models are iPod Touch, iPhone 4/4S, iPhone 5/5S/5C, and Galaxy S3/S4. You insert the desired mold into the clamp and insert that into the base. Next, you’ll choose the color of silicone you’d like (it comes with purple and pink) which is in a double syringe. You’ll insert this into the other side of the base and press down to fill the mold with silicone. After the case dries for two hours, you’ll then remove the case from the mold, remove excess silicone, and decorate your creation.
Make Your Case Refill
The Make Your Case kit comes with enough silicone to make two rubber cases. If you want to make more, you can buy a refill for about $4. This comes with a silicone syringe and a mixing rod (which is only to be used once).
Make Your Case Review
Although Make Your Case is still a new product, it would appears that sales for it have been brisk in my area because there was only one left at my local Toys R Us. Assuming you take your time and follow the directions, the process is rather straightforward: Pick your mold, insert in the clamp, put it on the base, choose your silicone, insert that into the base, and fill. Then remove and decorate. The time it took from cracking open the box until I injected the silicone into the mold was about 10 to 15 minutes. Although the product is marketed to girls, the instructions accurately state “adult supervision required.” Even though the product is recommended for children over the age of 8, an adult will need to assist for the creation of silicone cases.
An item of note which wasn’t immediately clear to me is that there are pre-made plastic cases in addition to those you can create yourself. At first I was under the impression that the plastic case was somehow involved in the creation of the rubber case, which it isn’t.
Take 1: Failure
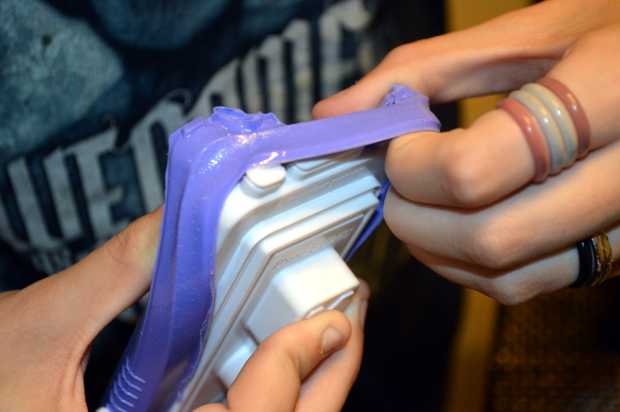
After waiting over two hours to remove the rubber silicone case from the mold, I read in the instructions to “very gently and slowly peel the molded case from the mold insert.” I didn’t realize just how careful they meant, and ripped the case while removing it from the mold.
After removing the case from the mold, the instructions tell you to use “your fingers and the enclosed clipper to gently remove or cut any extra silicone from the edge of the case.” This, too, proved to be burdensome to me. Between the original rip while removing the case and the hatchet job I did on the edges, I was rather disappointed with my first attempt at creating a silicone phone case. I decided that I would try a pair of scissors for my next attempt.
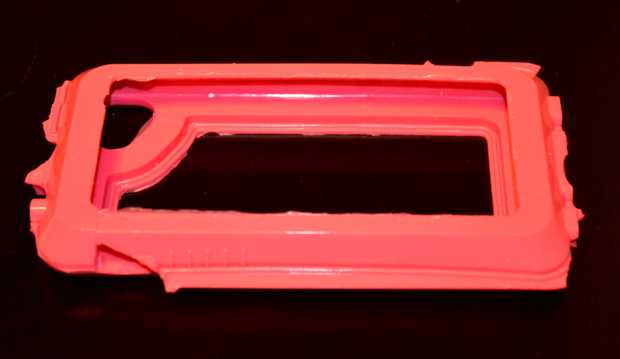
My first attempt was not pretty.
Take 2: Improvement
Undeterred by my rather underwhelming first attempt at creating a molded case, I immediately sought to use my second supply of silicone to give it another try. I knew this time I would need to go even slower when removing the case and the excess silicone. The preparation felt much faster the second time around. Once my two hours were up, I decided to exercise extreme caution while removing the case from the mold by allowing my teenage daughter to gently do it for me.
This time we did not tear the case, although the final result wasn’t quite as sleek as I would have liked. I felt that my second attempt was better than the first, but it still didn’t quite look as good as the photos.
Take 3: Ready-Made Case
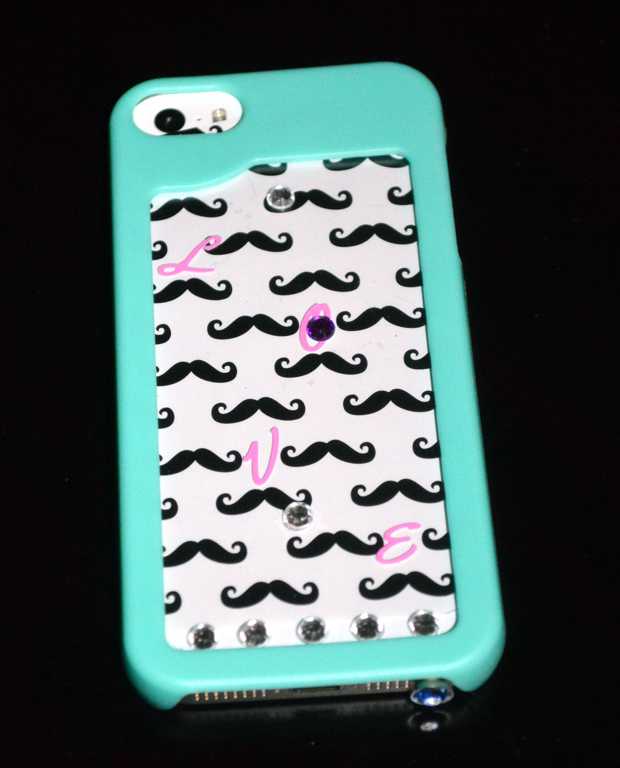
Fortunately, Make Your Case comes with pre-made cases which allow you to create a custom decorated case even if you encounter some of the problems with the rubber cases like I did. The pre-made cases simply require decoration with no assembly or prerequisite work. Looking back, I would probably have started off with the pre-made case to begin the process on a high note. Below you can see a final decorated pre-made case, which turned out well.
Decoration
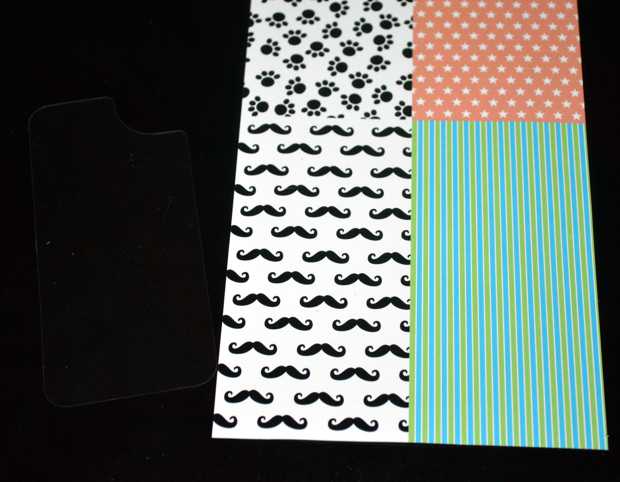
Once you’re ready to decorate your case, there are several decorative sheets you can use, along with a plastic strip which allows you to cut them to the proper size. You aren’t obligated to use the included decorations, as you can use your own photos for a more personal touch. Some of the included decorations include paw prints, mustaches, stars, stripes, hearts, polka dots, zig-zags, and emoticons.
Another area of concern which wasn’t immediately apparent to me while following their instructions is that is possible to flip the plastic guide the wrong direction and cut out the decorations incorrectly. Be sure before you cut your decoration that it will face the proper direction once inserted in the case. On my first attempt, I accidentally cut out a mirror image of the shape I wanted because I didn’t account for the direction that my decoration would face.
Once you have cut your decoration to the proper size, insert the plastic strip into the case, then the decoration behind that, and the phone goes in last.
Final Observations
Make Your Case feels like more like an arts and crafts project than a DIY toy. Those with a steady hand and ample dexterity will probably find no problem in creating sleek silicone cases. I found the creation of the silicone cases to be easy, but ran into problems when removing it from the mold and cutting off excess silicone. The instructions merely say to “peel the molded case from the mold insert” but don’t offer tips regarding the best method to achieve this. My teenage daughter would not use the rubber cases we made because they didn’t look well-made. She did, however, find the pre-made case to be suitable.
Alternatives to Make Your Case
There are numerous services and products which allow you to make your own cell phone case. Make Your Case, however, appears to be marketed primarily to girls and is presented as an arts and crafts product. In this respect, Make Your Case is in a somewhat unique niche.
Bottom Line
Make Your Case is not a perfect product, and the creation of the rubber cases may be problematic for some consumers. The inclusion of pre-made cases is the product’s saving grace, and will make it more palatable even if you butcher the rubber cases like I did.
Have you used Make Your Case? Tell me what you think of the product in the comments below.


Leave a comment